
- Published: April 7, 2026
- Author: SEO Free Genius Team
- Reading time: 7 minutes
You have great ideas, but when you hit publish — does anyone actually find your articles?
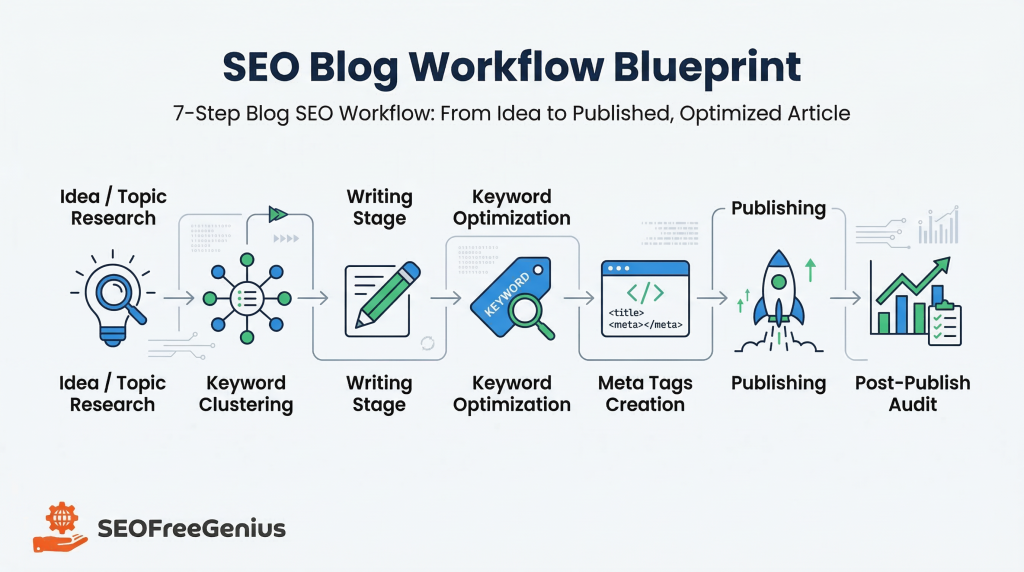
Blogging without a structured SEO process is like cooking without a recipe — sometimes it works, but consistency is what wins in the long run. Search visibility isn’t luck; it’s a repeatable workflow you can follow every single time you create content. In this pillar guide, you’ll learn a 7-step blog SEO workflow that takes your article from vague idea to fully optimized, published content using tools from seofreegenius.com. Bookmark this post, print the checklist, and use it every time you write.
Step 1: Find Your Core Topic
Problem: You’re writing about random topics and wondering why they don’t rank.
Why it matters: SEO success starts with demand — people need to actually search for what you’re writing about.
The Process
- Start with a broad idea (for example, “how to bake sourdough”).
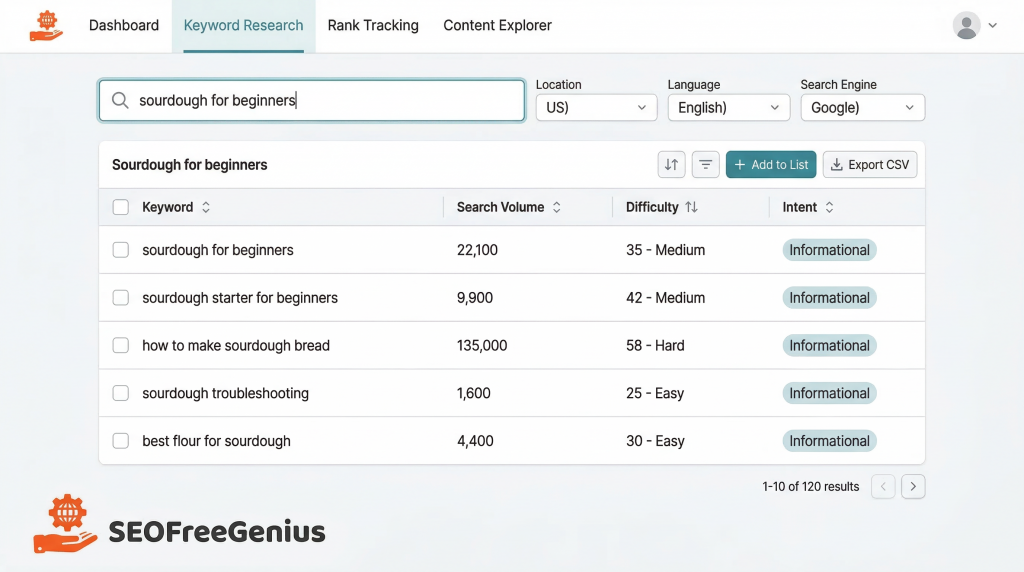
- Go to the Keywords Suggestion Tool on seofreegenius.com.
- Enter your topic and review the related keywords with search volume and intent.
- Pick one primary keyword (your main topic) and 3–5 secondary keywords (supporting subtopics).
Example: If your main idea is “sourdough,” the tool might suggest “sourdough for beginners,” “troubleshooting sourdough,” and “best flour for sourdough.”
Your article could then focus on “The Complete Sourdough Guide for Beginners.”
Pro Tip: Before you commit, Google your chosen keyword and study the top-ranking pages. Notice how they structure their content and which questions they answer — then plan to do it better.
Step 2: Cluster Your Keywords into a Structure
Problem: You’ve found keywords, but your article has no logical flow.
Why it matters: Proper organization helps Google understand topic relationships — and helps readers stay engaged.
The Process
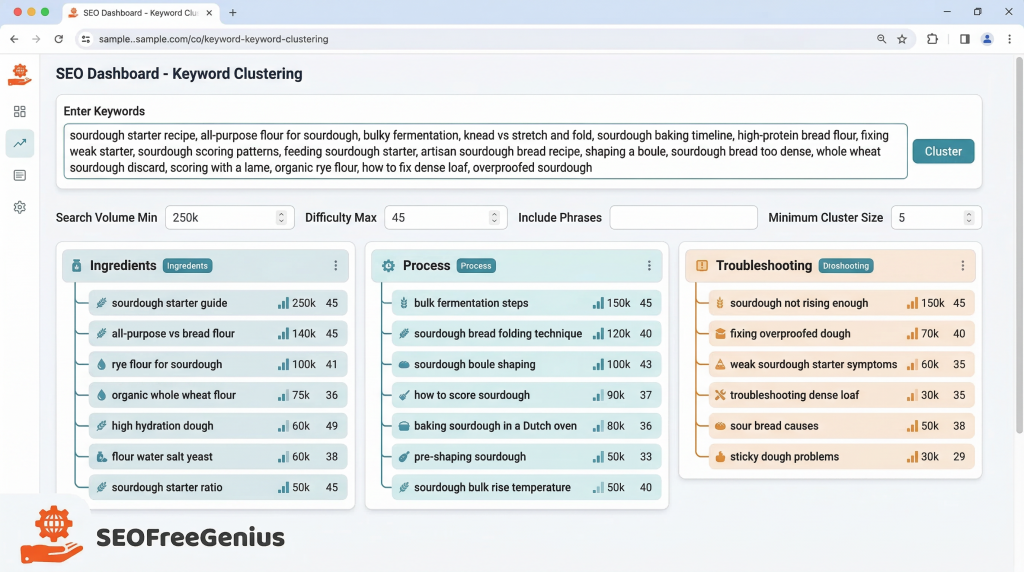
- Visit the AI Keyword Cluster Ideas tool on seofreegenius.com.
- Paste in your top 10–15 keywords from Step 1.
- The tool automatically groups them into meaningful clusters like:
- “Sourdough Starter Basics”
- “Troubleshooting Common Mistakes”
- “Essential Tools and Ingredients”
- Use these groups to build your H2s and H3s. Each cluster becomes a clear section of your article.
Bonus Tip: Logical clustering not only helps SEO but also improves readability. According to Yoast SEO’s readability guide, clear structure and scannable sections increase user dwell time.
Step 3: Write with Optimal Length in Mind
Problem: Publishing 400-word posts that barely scratch the surface.
Why it matters: Studies from HubSpot show that long-form, comprehensive content consistently ranks higher for competitive search terms.
The Process
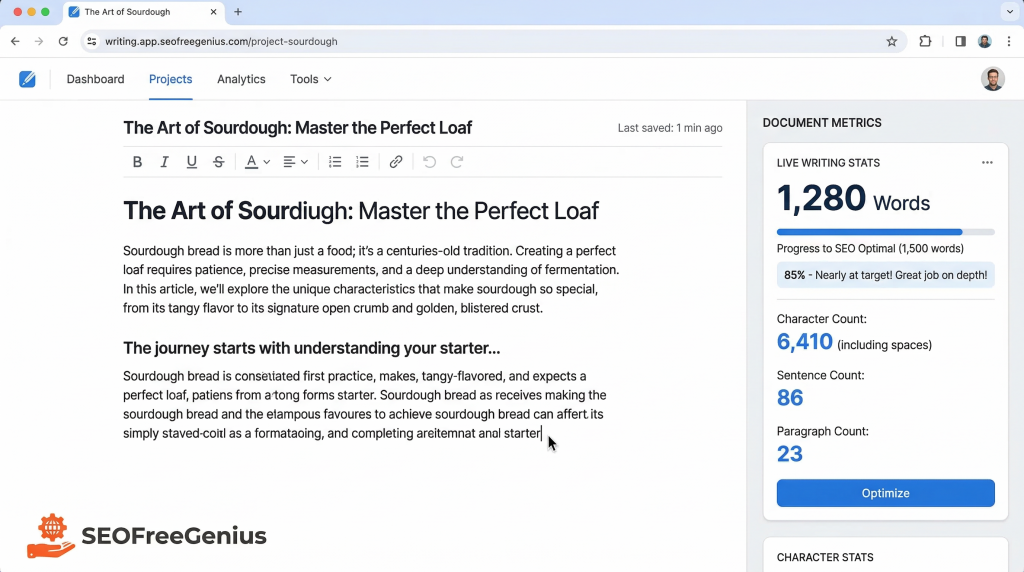
- Open the Word Counter on seofreegenius.com.
- Track your writing progress as you go.
- Aim for at least 1,200–1,500 words for a well-rounded, pillar-style article.
Example Comparison:
- 400-word post: “What Is Sourdough?” (light coverage, low authority).
- 1,500-word guide: “Complete Sourdough Guide for Beginners” (covers starter care, baking tips, common issues, ingredients).
Pro Tip: Word count isn’t just about length — it’s about depth. Make sure your article fully answers the reader’s search intent from start to finish.
Step 4: Optimize Keyword Density Naturally
Problem: Either overstuffing your keywords or forgetting to use them altogether.
Why it matters: Google needs topic signals, but unnatural repetition hurts readability and can trigger a spam penalty.
The Process
- Go to the Keyword Density Checker tool on seofreegenius.com.
- Paste your draft and enter your primary keyword.
- Aim for a 1–2% keyword density for your primary keyword — enough to signal relevance, not to spam.
- Sprinkle your secondary keywords 1–2 times each within relevant sections.
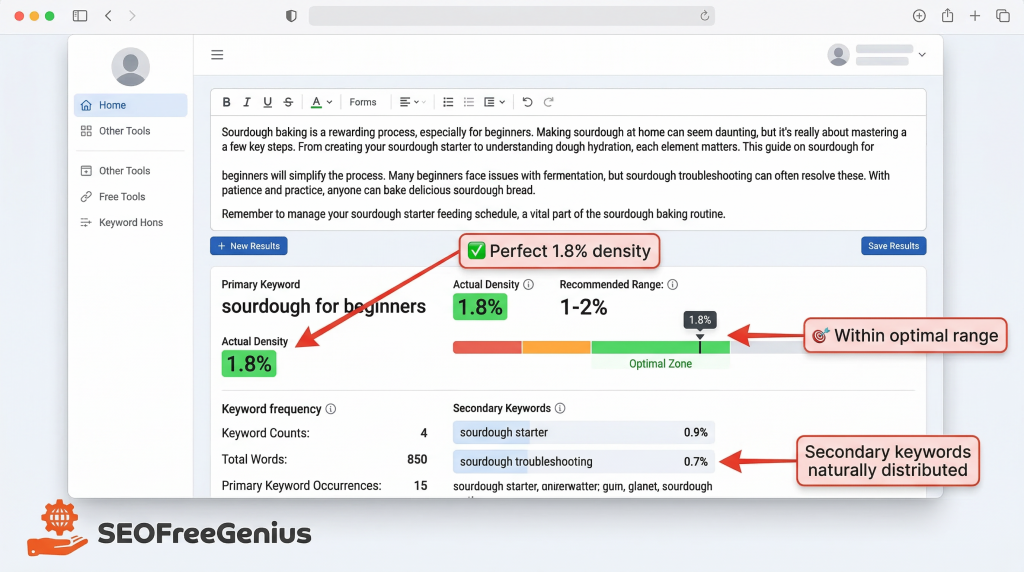
Example: If your primary keyword is “sourdough guide for beginners,” include it naturally in your introduction, one or two subheadings, and your conclusion — not every paragraph.
Pro Tip: Read your writing aloud. If a keyword sounds forced, replace it with a natural variant or pronoun.
Step 5: Create Compelling Meta Tags
Problem: Skipping the title and meta description or letting WordPress auto-fill them.
Why it matters: The click-through rate (CTR) from Google search results influences your rankings. A weak snippet can make or break engagement.
The Process
- Use the Meta Tags Analyzer on seofreegenius.com.
- Write a title tag (50–60 characters) that includes your primary keyword and a hook — e.g., “The Complete Sourdough Guide for Beginners: 7 Steps to Perfect Bread.”
- Write a meta description (150–160 characters) that summarizes value and includes your keyword.
- Preview how your tags appear in search results and adjust for clarity and clickability.
Pro Tip: Include power words like “Complete,” “Step-by-Step,” or “Proven.” Emotional triggers boost click-throughs — especially when combined with clarity.
Step 6: Publish with Technical Confidence
Problem: You hit publish… but your article looks messy, has broken headings, or unreadable blocks of text.
Why it matters: User experience (UX) metrics like time on page and bounce rate directly impact SEO rankings.
Publishing Checklist
Before you click “Publish”:
- Use only one H1 (your page title).
- Use H2s for main sections and H3s for sub-points.
- Add internal links to related articles on your website.
- Check that all images include alt text for accessibility.
- Test your formatting on desktop and mobile.
- Ensure your paragraphs stay short — 2–4 lines max.
Pro Tip: Think visually — include bullet points, clickable tables of contents, and clear section breaks. Google’s Search Quality Evaluator Guidelines highlight readability and visual clarity as key ranking signals.
Step 7: Post-Publish Audit
Problem: “Publish and pray” — skipping post-publish analysis.
Why it matters: SEO doesn’t end when you click “publish.” Small tweaks can significantly lift rankings and engagement.
The Process
- Run your published URL through the Meta Tags Analyzer again. Confirm your title and description display properly in Google.
- Revisit the Keywords Suggestion Tool every few months. Use it to uncover new related terms you can add in future content updates.
- Monitor performance with Google Search Console. If a keyword starts gaining traction, expand that section or create a dedicated follow-up post.
Pro Tip: Treat each article like a living document. Update it quarterly to maintain freshness and authority.
Quick Reference Checklist
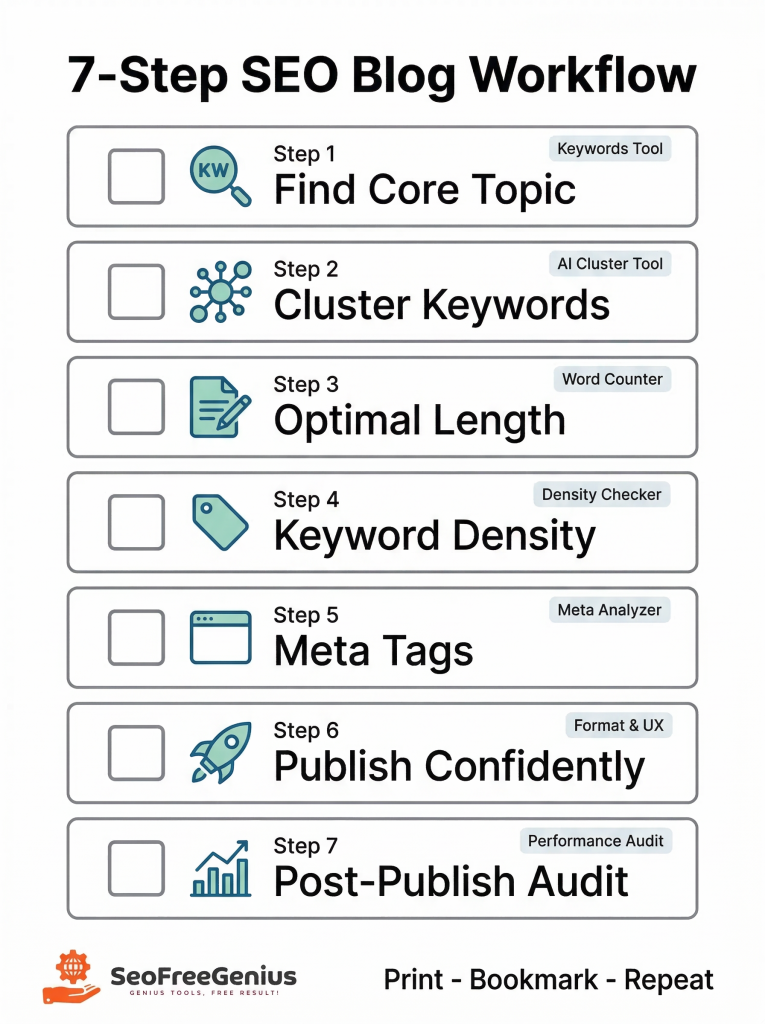
Your Blog SEO Workflow at a Glance
Step 1: Find Core Topic – Keywords Suggestion Tool
Step 2: Cluster Keywords – AI Keyword Cluster Ideas
Step 3: Write to Optimal Length – Word Counter
Step 4: Optimize Density – Keyword Density Checker
Step 5: Create Meta Tags – Meta Tags Analyzer
Step 6: Publish with Confidence – Formatting & UX review
Step 7: Post-Publish Audit – Ongoing improvements
Final Thoughts
SEO success isn’t about randomness — it’s about repetition. When you follow a clear, structured workflow like this one with seofreegenius.com’s free SEO tools, you turn content creation from guesswork into a system.
So next time you sit down to write, don’t just brainstorm and hope. Open this checklist, follow each step, and watch your posts start ranking with purpose and consistency. Consistency wins in SEO — and now you have the system to make it happen.

Samir H. M. is the creator of [seofreegenius.com], offering 66+ free SEO tools from Riyadh. He’s hands-on tested and built features like plagiarism checkers and backlink tools, plus 36 guides to help sites rank better. Practical, no-BS advice for real users.